Finishing up the ErgoDox
I've been busy with a few other keyboard projects since my last post on my ErgoDox build. While working on those projects, I've gotten some parts and done a few more tweaks to the ErgoDox that I'd like to share.
PBT DSA Keycaps
The biggest improvement was switching the keycaps. Originally I had used keycaps from WASD Keyboards that were designed to be used with a normal keyboard. Typical keyboards use keycaps that are very similar to DCS profile caps, which have different profiles for different rows:
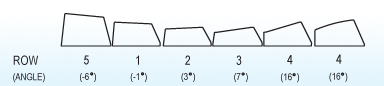
Source: Signature Plastics
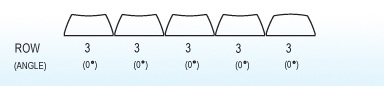
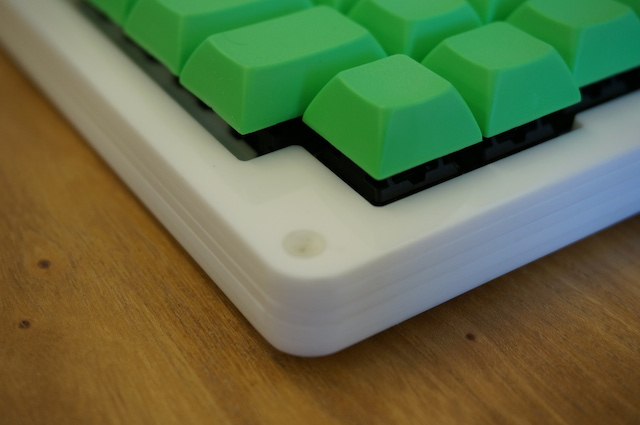
In contrast, DSA keycaps have concave spherical tops and are uniform in profile:
I had ordered a set of DSA keycaps from Signature Plastics for another project and decided to try them out on the ErgoDox:
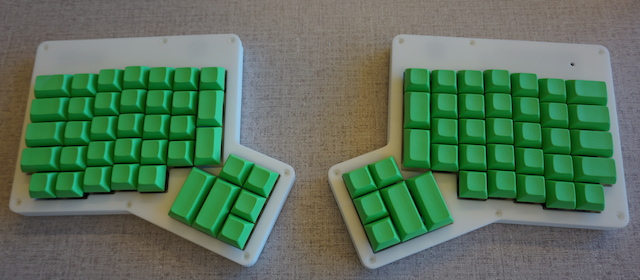
I was surprised with how much better these felt, particularly on the thumb cluster. I now realize that a lot of my discomfort reaching the upper keys on the the thumb cluster came from their relatively high profile.
The DSA keycaps are also made out of PBT plastic instead of ABS. They have a nice textured feel and the plastic is supposed to be much more robust. As I said in my last post, Pimp My Keyboard shop has PBT DCA blank sets for the ErgoDox for $43, which is a great deal and is definitely the way to go if you're sourcing your own parts.
TRRS Connector
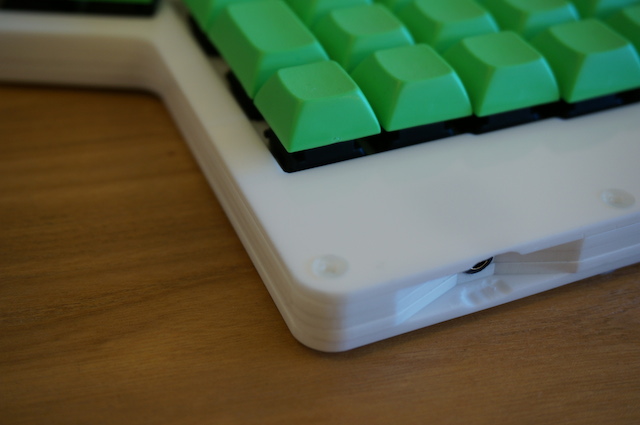
DigiKey finally got the TRRS connectors in stock and sent them to me. I was concerned that they wouldn't fit in my lower profile case, but a little Dremel action made it work:
The keyboard didn't work after I added the connector. It worked fine if I just had the right side plugged in, but as soon as I connected the left side, neither worked. I took the whole thing apart and used an ohmmeter to test the 4 connections between the two halves. It turned out that all of the connections were there, but there was a little resistance on one of them. I resoldered it more thoroughly and everything worked fine.
Sanding
Finally, I did a little experimentation with wet sanding the sides to remove some of the burn marks from the paper during the laser cutting and to give a more even finish. I used 400 grit sandpaper and made a little progress:
Acrylic dust is nasty stuff! It didn't make as much of a difference as I hoped. I'm going to do a little more experimentation sanding with acetone to see if I can melt it smoothly and make the 5 layers of acrylic look like one piece.
Next Steps
My next project is going to involve a lot of acrylic bending, so I'm probably going to also take a stab at cutting and bending a stand for the ErgoDox that tents it at a better angle. Any suggestions are appreciated!